Master Ladder Drawing: A Guide To Verticality, Perpendicularity, And Parallelism In Geometry
To draw a ladder, begin with a vertical line for the central support. Add a perpendicular horizontal line at the top and a parallel line at the bottom to form the top and bottom rungs. Connect these with diagonal lines to shape the sides. Erase excess lines and add vertical rungs for support. Color to enhance realism. Understanding geometry concepts like vertical lines, perpendicularity, and parallelism enriches the drawing process. Practice enhances skill proficiency.
How to Draw a Ladder: A Step-by-Step Guide for Aspiring Artists
Materials and Preparation:
Before embarking on your artistic journey, gather your essential tools:
- Paper: A sturdy sheet of paper will serve as your canvas.
- Pencil: Use a sharp pencil for precise lines and detailed shading.
- Eraser: An eraser is your trusty companion, ready to correct any missteps.
- Ruler: A ruler ensures straight and evenly spaced lines, providing structure to your masterpiece.
Step 1: Draw a Vertical Line
The vertical line is the backbone of your ladder, supporting its weight and connecting the rungs. It should be straight and perpendicular to the paper’s edge.
Step 2: Add a Horizontal Line at the Top
Imagine a ladder’s top rung. Draw a horizontal line perpendicular to the vertical line, representing the uppermost support for climbers.
Step 3: Add Another Horizontal Line at the Bottom
Mirror your previous step by drawing a parallel horizontal line at the bottom, symbolizing the ladder’s solid foundation.
Step 1: Draw a Vertical Line
- Explain the significance of the vertical line as the central support of the ladder.
- Discuss related geometry concepts: vertical line, straight line, line segment.
Step 1: The Foundation of Your Ladder: Drawing the Vertical Line
Before embarking on our artistic adventure, let’s lay the groundwork for our magnificent ladder. The vertical line stands as the very backbone of this structure, providing unwavering support. Just as a sturdy tree trunk holds up its branches, this line will serve as the central pillar upon which our ladder will rest.
Geometry plays a pivotal role here. The vertical line is a straight line that runs from top to bottom, perpendicular to the ground. Think of it as an arrow pointing straight up towards the sky. It’s not just any line; it’s the line that defines the ladder’s height and stability.
So, grab your trusty pencil and draw that vertical line with confidence. Let it be the strong and unwavering foundation for the ladder that’s about to take shape.
Step 2: Adding the Horizontal Top Rung – Unveiling Geometry Concepts
As we embark on this artistic journey to draw a ladder, let’s take a moment to pause and appreciate the beauty of geometry. In this pivotal step, we’ll introduce you to horizontal lines, parallel lines, and perpendicular lines.
Drawing the Top Rung: A Horizontal Line Parallel to the Base
With your vertical line standing tall as the backbone of our ladder, it’s time to add the top rung. To do this, we’ll draw a horizontal line that runs parallel to the base line.
Horizontal lines are straight lines that lie flat and level, like the horizon line on a painting. And parallel lines are two lines that run side by side, never meeting or crossing, like railroad tracks stretching into the distance.
In this case, our top rung will be a horizontal line parallel to the base line, forming the foundation for the ladder’s structure.
Perpendicular Lines: Connecting the Vertical and Horizontal
Now, let’s connect the top rung to our vertical line. We’ll do this using perpendicular lines.
Perpendicular lines are two lines that intersect at a right angle, forming a 90-degree angle. In our ladder, the vertical line and the top rung will be perpendicular, creating a sturdy and stable connection.
By understanding these geometry concepts, you’ll not only draw a more accurate ladder but also gain a deeper appreciation for the role of geometry in our everyday world. So, let’s embrace the geometry and continue our artistic adventure!
Step 3: Extending the Ladder’s Reach with a Bottom Rung
As we embark on the next step in our ladder-drawing adventure, we’ll extend its reach downward by adding a horizontal line at the bottom. This crucial rung will provide support and establish the ladder’s base.
To achieve a parallel line, imagine two straight lines running alongside each other like railroads. Draw your bottom rung parallel to the top rung, ensuring it remains horizontal. This parallel arrangement ensures stability and uniform spacing.
Let’s pause and appreciate the geometry concepts we’ve encountered so far:
- Horizontal line: A line that runs parallel to the ground or any other flat surface
- Parallel line: Two lines that never intersect and maintain a constant distance
- Perpendicular line: Two lines that intersect to form a right angle (90 degrees)
With the bottom rung firmly in place, our ladder takes shape, ready to support weight and provide access to higher ground.
Step 4: Connecting the Lines with Diagonal Lines
As we gradually build our ladder, it’s time to connect the top and bottom rungs with diagonal lines. These lines not only complete the shape of the ladder but also add to its structural integrity.
In geometry, diagonal lines are those that connect non-adjacent vertices of a polygon. In this case, our ladder is a quadrilateral, and the diagonal lines will form its sides.
The slope of a line is a measure of its steepness. It’s calculated by dividing the change in vertical distance by the change in horizontal distance. For the sides of the ladder, the slope can vary depending on the desired angle. A steeper slope results in a narrower ladder, while a gentler slope creates a wider one.
The angle between two lines is formed by the intersection of the lines. In our case, the diagonal lines should intersect the vertical line at a right angle (perpendicularly) to ensure proper support.
To draw the diagonal lines:
- Start at the top rung and draw a line that intersects the vertical line at the desired angle.
- Repeat the process at the bottom rung, making sure the diagonal line is parallel to the first one.
- Erase any unnecessary lines inside the ladder shape.
Remember: The sides of the ladder should be of equal length to maintain symmetry and stability.
Step 5: Erase the Excess Lines
- Guide the reader on erasing the unnecessary lines inside the ladder’s shape.
- Introduce concepts: eraser, erasing, removing.
Step 5: Erasing the Unnecessary Lines
Now that you have the basic shape of your ladder drawn, it’s time to erase the excess lines that are no longer needed. These include the lines that you used to guide your drawing, such as the vertical lines that you drew to create the sides of the ladder and the horizontal lines that you drew to create the rungs.
To erase these lines, you will need an eraser. Erasers come in a variety of shapes and sizes, so choose one that is comfortable for you to use. Once you have an eraser, gently rub it over the lines that you want to erase. Be careful not to rub too hard, or you may tear the paper.
As you erase the lines, you will start to see the shape of your ladder emerge. Continue erasing until all of the unnecessary lines are gone.
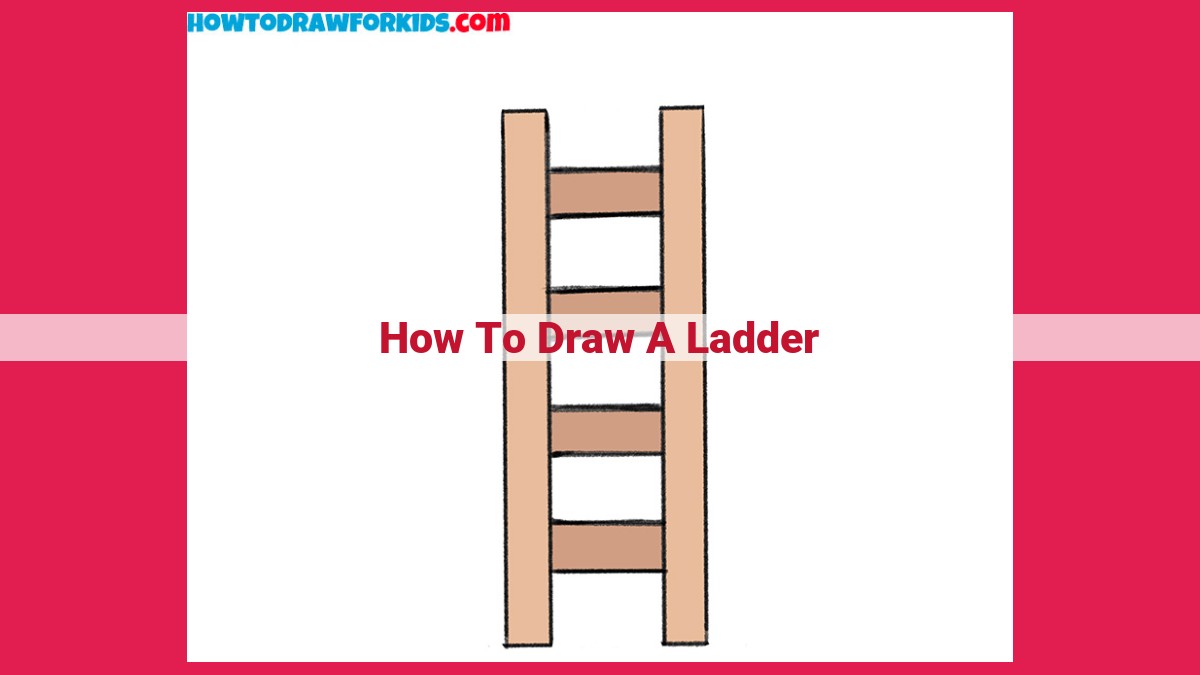
Once you have erased all of the excess lines, your ladder should look like the one in the picture below.
    |
    |
    |
    |
    |
    |
    |
    |
    ----
Concepts Introduced
- Eraser
- Erasing
- Removing
Step 6: Add Details Like Rungs and Sides
As we progress in our ladder-drawing adventure, it’s time to embellish it with essential details that will bring it to life. Let’s start by adding the rungs, those horizontal bars that provide support for climbing.
To do this, we’ll draw several parallel vertical lines, each representing a rung. Remember, these lines should be perpendicular to the horizontal lines we drew earlier, ensuring a sturdy and functional ladder.
Now, let’s not forget the sides of our ladder. Using two additional vertical lines, we’ll connect the top and bottom rungs to form the upright sides. These sides provide the stability and strength that will allow our ladder to stand upright.
As you add these details, embrace the concepts of support and functionality. Understand how each element contributes to the overall structure of the ladder, making it a reliable tool for reaching new heights.
Step 7: Embellish Your Ladder with Vibrant Hues
Embrace the Artist Within:
Drawing a ladder can be an exciting artistic adventure. But what truly brings your creation to life is adding a splash of color. So, let’s unleash your inner artist and explore the magical world of coloring.
Paint or Markers: Your Canvas Awaits:
Whether you prefer the smooth glide of paint or the bold strokes of markers, the choice is yours. Each medium offers a unique texture and vibrancy, allowing you to paint a masterpiece that reflects your personal style.
Realistic Hues:
As you embark on your coloring journey, strive for colors that mimic the natural appearance of a ladder. Think warm, earthy tones like beige, brown, or shades of yellow. These colors evoke the sturdy and practical nature of your creation.
Bring It to Life:
Once your ladder takes on its primary hue, don’t be afraid to add details that enhance its realism. Highlight the edges with a darker shade to create depth and dimension. Use a lighter color for the rungs to showcase the support they provide.
Tips for Realistic Coloring:
- Apply thin layers: Multiple thin layers create a more natural look than one thick coat.
- Blend colors: Use a blending tool or your fingers to soften the transitions between colors, creating a seamless effect.
- Highlight and shade: By adding highlights and shadows, you can give your ladder a three-dimensional quality.
Remember, the most important aspect of coloring is to have fun and express your own creativity. So, take your time, experiment with colors, and let your imagination soar as you transform your drawn ladder into a vibrant work of art.