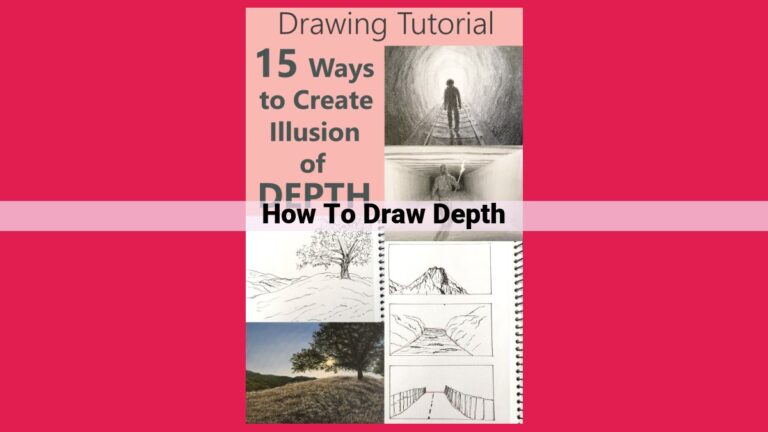
How To Draw A Stomach: An Artist’s Guide To Realistic Depictions
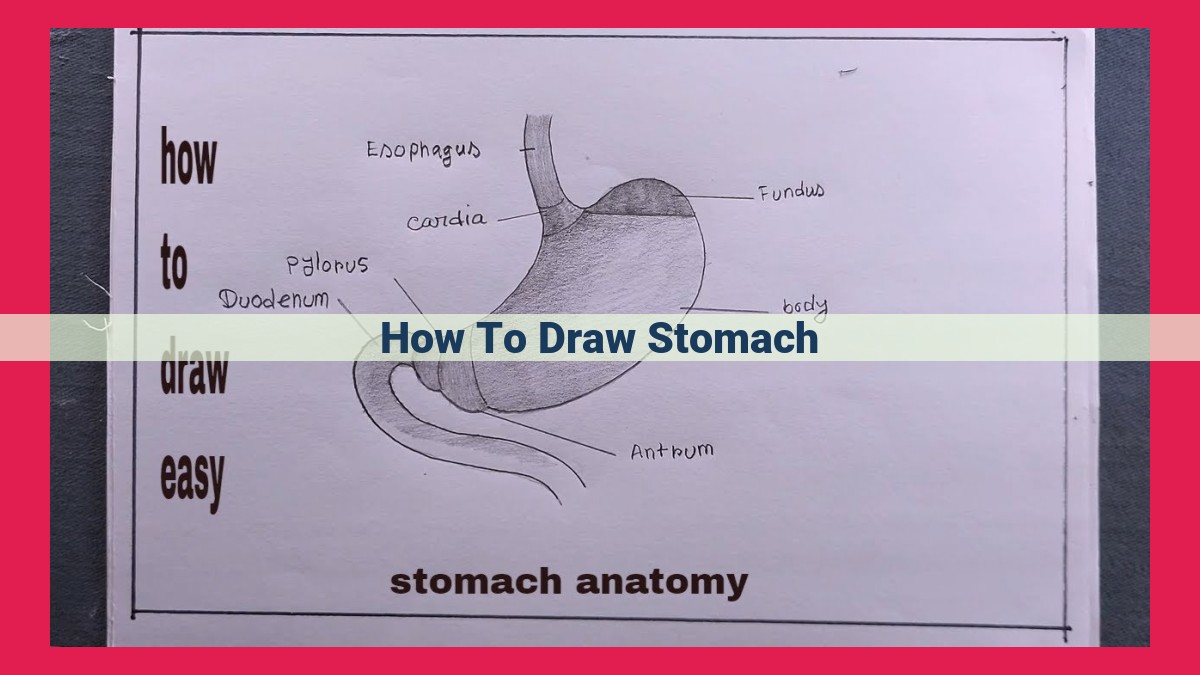
To draw a stomach, begin by understanding its anatomy and proportions. Use symmetry to capture the overall shape and contours. Employ shading and depth to create realism, and incorporate the rib cage anatomy and abdominal muscles to enhance the depiction. Accurately render the belly button and consider exploring navel hernia in your drawings.
The Significance of Understanding Stomach Anatomy in Drawing: A Journey to Accuracy and Realism
In the realm of artistic representation, capturing the human body with precision is a testament to the artist’s mastery. Among the body’s intricate structures, the stomach holds a prominent place, demanding an understanding of its anatomy for its accurate portrayal. For artists seeking to elevate their craft, delving into the stomach’s anatomical intricacies is a transformative step, empowering them to bring their drawings to life with unparalleled realism.
The stomach, a vital organ in the digestive system, plays a crucial role in the body’s nourishment and energy supply. Its shape, proportions, and relationship with surrounding structures are essential elements to consider when drawing, as they directly influence its overall appearance and function. By gaining a thorough understanding of these anatomical details, artists can achieve an uncanny likeness in their depictions of the stomach, captivating viewers with the authenticity of their work.
Section 1: Proportions and Symmetry Mastery
- Discuss the principles of symmetry and balance in stomach drawing.
- Guide readers in capturing the overall shape and contours of the stomach aesthetically.
Section 1: Proportions and Symmetry Mastery
The journey to capturing the essence of the stomach in your drawings begins with understanding its proportions and symmetry. Imagine the stomach as an elliptical form, its length stretching gracefully from the ribs to the belly button. Envision the center of this ellipse as a guiding line, dividing the stomach into two symmetrical halves.
Balancing these halves is crucial for an aesthetically pleasing depiction. Imagine a plumb line dropped from the center point, creating a vertical axis. The stomach should appear balanced around this axis, with the contours of each side mirroring the other.
The ripple of muscles and curves that shape the stomach should flow in harmony. Pay close attention to the overall shape, ensuring a smooth and graceful transition from one contour to the next. By mastering these principles of symmetry and proportion, you’ll lay the foundation for a visually captivating representation of the stomach.
Section 2: Unleashing Shading and Depth
- Describe the use of light, shadow, and contrast to create depth and realism.
- Emphasize the role of highlights in enhancing shine and gleam.
Section 2: Unleashing Shading and Depth
In the realm of drawing, the stomach is a canvas of shadows and highlights, a dance of light and dark that brings it to life. Step into this enchanting world where we delve into the art of shading and depth, transforming your anatomical sketch into a masterpiece.
Embrace the magical interplay of light and shadow. As light dances across the stomach’s contours, it casts soft highlights that enhance its roundness and gleam. Conversely, shadows sculpt its deeper recesses, revealing the subtle variations of its form. By masterfully blending these elements, you’ll evoke a sense of realism that will captivate the viewer.
Harness the power of contrast to create a dynamic drawing. By juxtaposing areas of intense light with areas of deep shadow, you’ll emphasize the stomach’s distinct features and convey a sense of depth. This visual play will draw the eye in, inviting viewers to explore the intricacies of your creation.
Let highlights ignite the stomach’s surface. Use these bright touches to replicate the way light reflects off its smooth, moist exterior. They’ll enhance the stomach’s shine and gleam, adding vibrancy and life to your drawing. By carefully placing highlights, you’ll guide the viewer’s gaze and create a focal point that draws attention to the stomach’s unique beauty.
Section 3: Delving into Rib Cage Anatomy
Unveiling the intricacies of the human form, we now venture into the realm of the rib cage, an enigmatic structure that cradles the stomach within its protective embrace.
Comprising an intricate latticework of bones, cartilage, and ligaments, the thorax (rib cage) serves as a sturdy framework, safeguarding the delicate organs it encloses. The sternum, commonly known as the breastbone, forms the central anterior wall of the thorax, providing attachment points for ribs and cartilage.
Twelve pairs of ribs gracefully curve around the thorax, each rib connecting to the sternum through costal cartilage. These flexible yet resilient structures allow for expansion and contraction during the rhythmic symphony of breathing. The rib cage’s pyramid-like shape plays a pivotal role in shaping the stomach, its gentle slopes and contours influencing the stomach’s overall form.
Comprehending the relationship between the rib cage and the stomach is paramount for artists striving to capture the nuances of the human body. By meticulously observing and studying this anatomical interplay, we unlock the secrets to rendering stomachs that exude authenticity and realism.
Section 4: Navigating the Abdominal Muscles
Unveiling the Muscular Architecture of the Stomach
Beneath the skin’s surface lies a complex network of muscles that orchestrate the movements of the stomach. Understanding these muscles, their orientation, and their interplay is crucial for capturing the stomach’s anatomy and shaping accurately in your drawings.
Introducing the Abdominal Quartet
The abdominal wall comprises four main muscles, each playing a distinct role in shaping and supporting the stomach:
- Rectus Abdominis: The most visible muscle, its vertical fibers run down the center of the abdomen. It flexes the trunk and compresses the stomach.
- External Oblique: Situated laterally, its fibers run diagonally from the ribs to the pelvis. It assists in twisting, bending, and rotating the trunk.
- Internal Oblique: Lying beneath the external oblique, its fibers run diagonally in the opposite direction. It also contributes to twisting, bending, and rotating the trunk.
- Transversus Abdominis: The deepest abdominal muscle, its fibers run horizontally across the abdomen. It stabilizes the trunk and compresses the abdomen, supporting the stomach.
Understanding Their Influence on Stomach Shape
These muscles, working in harmony, define the stomach’s shape and position. The rectus abdominis creates the vertical midline, while the oblique muscles contribute to the stomach’s lateral contours. The transversus abdominis provides support and compression, shaping the stomach’s posterior surface.
By mastering the anatomy and interplay of these abdominal muscles, you empower yourself to accurately represent the stomach in your drawings, lending them a sense of realism and dynamism.
Section 5: The Art of Depicting the Belly Button
The belly button, also known as the umbilicus, is a fascinating feature that adds a touch of realism and character to any stomach drawing. It is located at the center of the abdomen, where the embryonic umbilical cord once connected the fetus to the mother.
Positioning the Belly Button
The positioning of the belly button is crucial for anatomical accuracy. It should be placed approximately two-thirds of the way down from the sternum to the pubic bone. When drawing the belly button, pay attention to its shape and size. It can vary from a small dimple to a more pronounced protrusion.
Rendering the Belly Button for Realism
The key to capturing the realism of the belly button lies in shading and highlighting. Use a soft pencil to create subtle shadows and highlight the edges to create a sense of depth. Additionally, consider adding a slight oval-shaped indent to replicate the natural depression of the umbilicus.
Importance of Accurate Belly Button Depiction
An accurately rendered belly button not only enhances the realism of your stomach drawing but also adds a touch of personality. It can indicate the age, body type, and even the health status of the individual being depicted. By paying attention to this detail, you can elevate your drawings and bring them to life.
Section 6: Exploring Navel Hernia in Drawing
The human body is an intricate tapestry of anatomy and function, and the stomach is no exception. While we explored its general contours earlier, a specific condition known as navel hernia brings its own set of drawing challenges. Understanding and depicting it accurately can add depth and realism to your artwork.
A navel hernia occurs when part of the intestine or other abdominal tissue protrudes through a weakened area in the muscle wall surrounding the belly button. This can happen due to a birth defect, excessive straining, or conditions that increase abdominal pressure, such as pregnancy or obesity.
When drawing a navel hernia, it’s crucial to capture the protrusion’s size, shape, and location. Pay attention to how it affects surrounding tissues and how it interacts with the skin. The hernia may appear as a small, rounded bulge, or it could be larger and more pronounced, depending on its severity.
To accurately depict a navel hernia, consider these tips:
-
Observe references: Study photographs or medical illustrations of navel hernias to understand their appearance and variations.
-
Use shading and highlights: Create depth and dimension by shading the hernia and its surrounding areas. Highlights can help define the contours and emphasize the protrusion.
-
Pay attention to skin texture: The skin over a navel hernia may be stretched or wrinkled, so capture this texture to convey the condition’s impact.
-
Consider the surrounding anatomy: Remember that the navel hernia exists within the context of the abdomen. Draw the belly button, abdominal muscles, and other surrounding structures to provide context.
By incorporating these techniques, you can effectively render navel hernias in your drawings, adding a layer of anatomical realism and depth to your artwork.