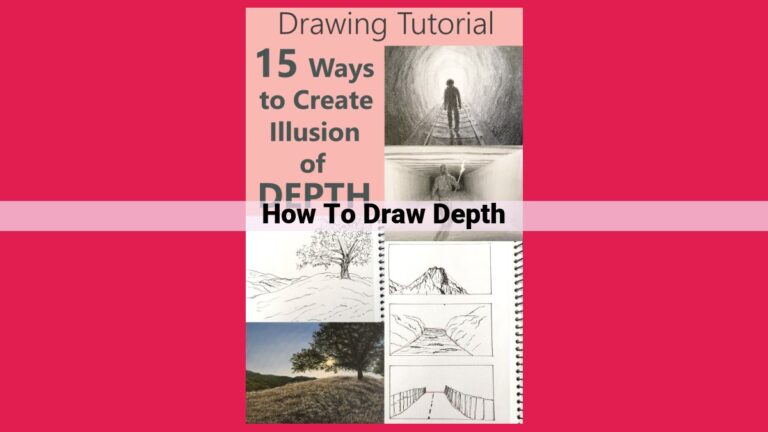
How To Draw A Seed: A Step-By-Step Guide For Artists
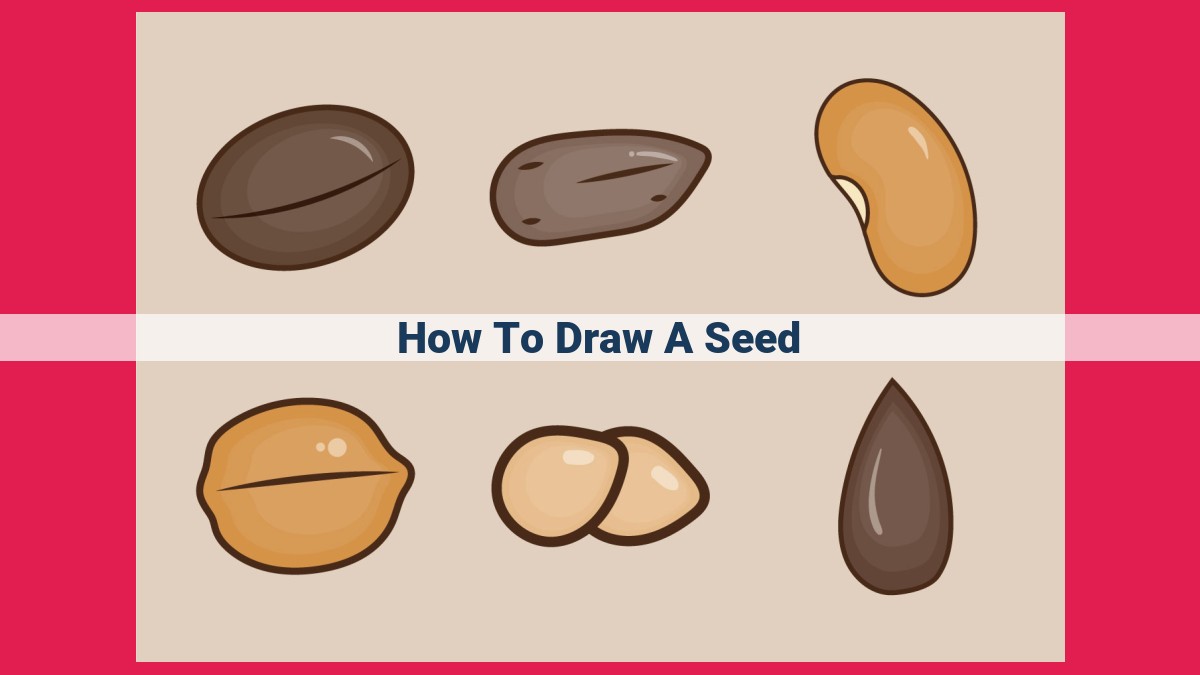
To draw a seed, begin by sketching its basic shape, including the hilum (scar) and micropyle (opening). Next, add details to the seed coat, capturing its texture, ornamentation, and colors. Finally, shade the seed for depth and texture, considering the background and composition to enhance its visual appeal.
- Importance and beauty of seeds as drawing subjects
- Overview of the steps involved in drawing a seed
How to Draw a Seed: A Step-by-Step Guide to Capture Its Beauty
Seeds, often overlooked and underappreciated, hold an intrinsic beauty that invites artistic exploration. These tiny capsules of life, brimming with genetic potential and ecological significance, offer a fascinating subject for drawing enthusiasts. In this comprehensive guide, we will embark on a journey to unravel the intricacies of seed drawing, transforming these humble marvels into captivating works of art.
Our artistic endeavor will unfold in a series of methodical steps, empowering you with the knowledge and techniques to accurately and expressively portray seeds on paper. From capturing their intricate shapes to conveying their delicate textures, we will delve into the nuances of seed drawing, unlocking their artistic potential.
Understanding the Seed’s Form
Seeds exhibit a remarkable diversity in their shapes and sizes, reflecting the countless adaptations they have evolved over eons. Understanding the fundamental morphology of a seed is essential for faithfully reproducing its form in our drawings.
- Basic Outline: Observe the seed’s overall shape, paying attention to its rounded, elongated, or irregular contours. Capture the curvature and any significant protrusions or depressions.
- Hilum and Micropyle: Locate the hilum, the scar marking the point of attachment to the parent plant, and the micropyle, a small opening crucial for seed germination. Their presence and position vary among species, adding to the seed’s distinct character.
Step 1: Capturing the Seed’s Essence: Outlining the Basic Shape
As you embark on the artistic journey of drawing a seed, the first step is to encompass its essence by outlining its basic shape. This foundational step involves understanding the morphology and shape of the seed. Morphology, the study of form and structure, is crucial in capturing the seed’s unique characteristics.
Observing the seed closely, you’ll notice its distinct shape, whether it’s oval, round, elongated, or otherwise. Pay attention to its contours, curves, and any irregularities that make it stand out. This understanding will guide you in sketching the seed’s form on paper.
When outlining the shape, start with light strokes, gradually refining and defining the lines as you progress. Use smooth, continuous strokes to capture the overall curvature and form of the seed. Avoid sharp or abrupt lines, as they can disrupt the natural flow of the seed’s shape.
Step 2: Capturing the Essence of the Hilum and Micropyle
As we embark on the delicate task of drawing a seed, our journey takes us to the fascinating world of its anatomy. Two crucial features that define a seed’s structure and potential are the hilum and the micropyle. Let’s delve into their significance and how to accurately represent them in our artwork.
The hilum is the scar or mark on the seed’s surface where it was once attached to the parent plant. It is through this lifeline that nutrients and water flowed, nurturing the developing seed. As we draw the hilum, we capture a glimpse of the seed’s past, connecting us to the cycle of life and renewal.
Adjacent to the hilum lies the micropyle, a tiny opening that serves as the gateway for pollen tube entry during fertilization. It is through this minute portal that a new life begins, as the pollen tube transports the sperm cells to the egg within the seed. By illustrating the micropyle, we pay homage to the incredible potential inherent in every seed, a symbol of hope and new beginnings.
When drawing these crucial features, it’s essential to pay attention to their size, shape, and position relative to each other. The hilum typically appears as a small, roundish depression, while the micropyle is often portrayed as a narrow slit or pore. By capturing their intricate details, we enrich our artwork with scientific accuracy and a deeper understanding of the seed’s biology.
Step 3: Embellishing the Seed Coat with Intricate Details
As you dive into the intricacies of the seed coat, it’s time to capture the subtle textures, ornate patterns, and vibrant hues that tell a captivating story. This is where your artistic flair truly shines as you explore different techniques to showcase the seed’s unique characteristics.
The Canvas of the Seed Coat
The seed coat, like a miniature canvas, presents a myriad of possibilities for artistic interpretation. Smooth surfaces evoke a sense of elegance, while rough ones convey a rustic charm. Striations, grooves, and bumps add depth and character, transforming the seed into a microcosm of geological wonders.
A Symphony of Colors and Patterns
Unleash your inner colorist as you depict the vibrant hues that adorn the seed coat. Monochromatic schemes offer a sophisticated allure, while multicolored ones burst with life and energy. Intricate patterns, whether geometric or organic, create a visual dance that captivates the eye.
Artistic Approaches to Seed Coat Detailing
Experiment with various artistic approaches to highlight the seed’s unique features. Pencil shading allows for subtle gradations that mimic the natural textures. Colored pencils and watercolors bring a vibrant splash of color, while ink and charcoal evoke a sense of enigmatic mystery.
Remember, the key to capturing the essence of the seed coat lies in observation and interpretation. As you delve into the details, allow your artistic vision to guide you, translating the wonders of nature onto the page.
Step 4: Shading the Seed for Depth and Texture
Unveiling the contours and intricacies of a seed requires the masterful play of light and shadow. This step breathes life into the drawing, transforming it from a mere outline into a visually captivating portrayal.
Shading enhances the seed’s three-dimensional quality, inviting readers to run their fingers over its smooth curves and intriguing textures. By capturing the interplay of light and shadow, you create an illusion of depth, making the seed appear to leap off the page.
Techniques for Effective Shading:
- Hatching: Create fine, parallel lines that follow the seed’s form. Vary the spacing and pressure to suggest subtle transitions in shade.
- Cross-Hatching: Superimpose layers of hatching lines in different directions to build up rich, dark tones.
- Stippling: Apply tiny dots in varying densities to create gradual shading effects.
- Blending: Use a blending tool to smooth out transitions between shades, creating soft, velvety textures.
Highlighting Details:
Don’t forget to accentuate the seed’s unique features through selective highlighting. Use bright, concentrated strokes to draw attention to the hilum, micropyle, and other distinguishing characteristics. This contrast adds depth and emphasizes the seed’s individuality.
By carefully manipulating light and shadow, you can transform a simple seed drawing into an artwork that captures the beauty and complexity of nature.
Step 5: Enhancing the Seed’s Essence through Background and Composition
As you progress in your seed drawing endeavor, don’t overlook the significance of the background and composition. These elements play a crucial role in elevating the visual appeal of your artwork and bringing the seed’s beauty to life.
Selecting the Perfect Background
The background serves as a canvas that complements the seed’s colors and textures. Choose a backdrop that harmonizes with the tones, shades, and patterns of your subject. A plain background in a neutral hue, such as white or light gray, allows the seed to stand out as the centerpiece, drawing the viewer’s focus directly to its intricate details. Alternatively, a textured or colored background can introduce additional visual interest, creating a dynamic contrast that accentuates the seed’s unique characteristics.
Arrange the Seed with Artistic Intent
The way you position the seed within the frame can profoundly impact its overall impact. Experiment with different arrangements to find a composition that showcases its features effectively. Consider the seed’s shape, orientation, and any notable details or markings you wish to emphasize. By carefully manipulating the placement of the seed, you can guide the viewer’s gaze toward specific areas, highlighting the aspects you deem most compelling. Whether you choose to center the seed, position it off-center, or create a dynamic grouping of multiple seeds, each arrangement offers a unique opportunity to convey a distinct narrative and evoke a particular emotion.
Explore the Wonders of Seeds Through Drawing
As an artist, have you ever been captivated by the intricate beauty of seeds? In this comprehensive guide, we will embark on a journey to learn how to draw a seed, capturing its unique morphology and vibrant details.
Step 1: Outline the Basic Shape
Understanding a seed’s shape is crucial. Observe its overall form, noting its curves and contours. Lightly sketch these outlines, capturing the essence of the seed without getting bogged down in details.
Step 2: Hilum and Micropyle
Identify the hilum, the scar where the seed was attached to the ovary, and the micropyle, a small opening that allows water to enter during germination. Draw these features precisely, as they are essential for seed structure and development.
Step 3: Seed Coat Details
The seed coat is an important protective layer. Observe its texture, ornamentation, and colors. Use different strokes and shading techniques to depict these unique characteristics. Remember, artistic exploration is encouraged to showcase the seed’s individuality.
Step 4: Shading and Texture
Light and shadow play a crucial role in creating depth and texture. Use pencils or charcoal to carefully shade the seed, emphasizing its contours and highlights. This step brings the seed to life, giving it a three-dimensional appearance.
Step 5: Background and Composition
Consider the background carefully. It should complement the seed’s colors and textures without distracting from its beauty. Experiment with different seed arrangements to create a visually appealing composition. By following these steps, you will not only learn to draw a seed but also appreciate its biological significance and diversity.
Related Concepts to Explore:
- Seed Morphology and Anatomy: Delve into the fascinating world of seed structure, including seed coat variations and internal components.
- Seed Germination and Growth: Understand the amazing process of seed germination and the factors that influence seed growth.
- Seed Coat Characteristics and Variations: Discover the diverse textures, patterns, and colors of seed coats across different plant species.
- Seed Photography, Illustration, and Painting: Explore various artistic mediums used to capture the beauty and complexity of seeds.
- Seed Arrangement, Grouping, and Display Techniques: Learn the art of arranging and displaying seeds for aesthetic and educational purposes.